Friday, October 28, 2016

Building A Sewing Table

Building A Sewing Table

I searched for a suitable sewing table that fit my requirements:
  1. Size - it has to be big enough to easily work a quilt
  2. Sewing machine has to be flush with the table surface
  3. Affordable
Needles to say affordable was not achievable.  Therefore, I decided to build my own table given that I am pretty handy with tools.  For supplies I purchased the following:
  1. Desk top - at local hardware store, 30 x 60 x 1.5 inches (note the Ikea table top is not suitable for this project).  This table top is solid particle board.
  2. Drawer unit from Ikea to support one end.
  3. Three adjustable table legs from Ikea.
  4. Six x 6 inch stainless steel carriage bolts with nuts.  You must have 3 nuts per bolt
  5. 12 x 15 x 1/2 inch melamine board/shelf
  6. White melamine paint.
You need the specific sewing machine that this is being made for plus you can use/include the Plexiglas table if your machine has one.  The opening for the sewing machine is cut near the front right hand of the table top leaving enough room on the right for accessories.

With the location and outline of the sewing machine marked I taped paper over the table to protect it from scratches. 

Drill holes in the corners for the saw blade and cut carefully.  Since this is thick wood, the jigsaw will tend to wander or tilt so go slowly. 

Once the machine opening is cut, I traced the shape of the Plexiglas sewing table and used a router to cut out the shape taking care to set the depth correctly. 

Doing the routing is tedious and slow!

The rough routing is done. 

Fine tuning of the edges of the routing. 

 The routing is finished!

The sewing machine and the Plexiglas sewing table fit nicely! 

Some white melamine paint.

The holes for the carriage bolts are counter sunk to allow the bolt
heads to sit below the surface of the top.

The bolts have to be cut once the height of the shelf is set.

The bolts before cutting.

The bolts have been cut to length

 Placement of the bolts must consider the location of the
features on the lower body of the sewing machine.

Use 3 nuts, one to hold the bolt tight to the top.
The other two hold the shelf in place.

The finished table.  You can see the tablet supporting the machine and the 3 legs.  I used one in the rear middle area to prevent bouncing. 

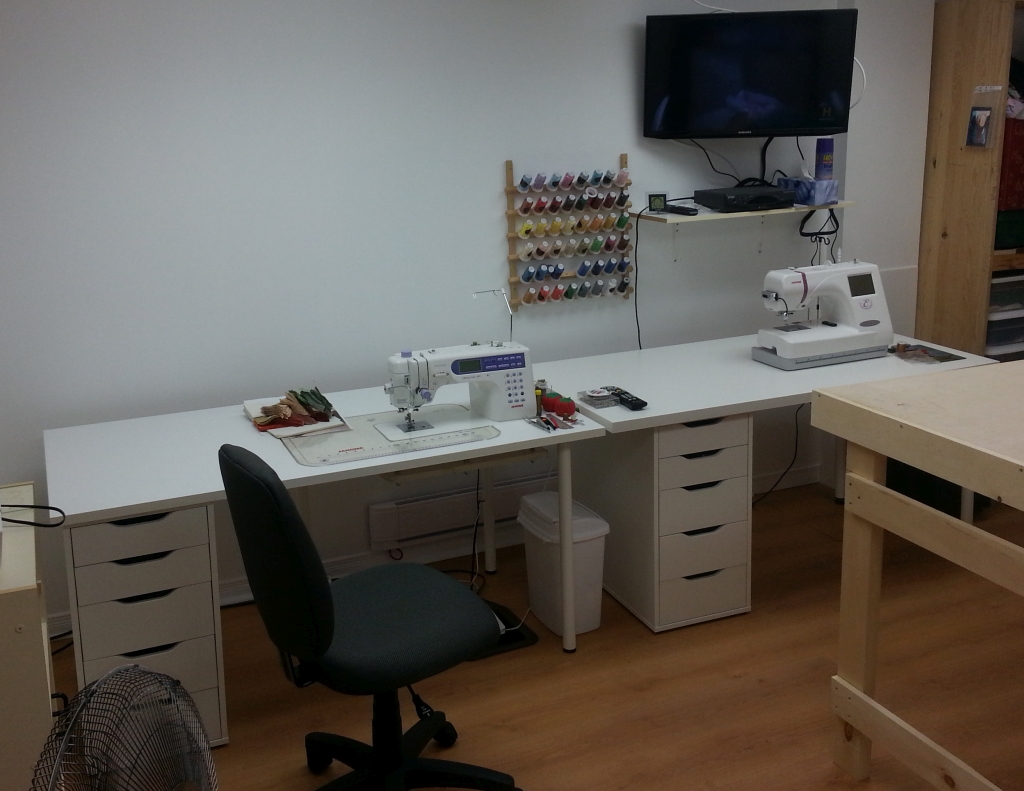
Here is my sewing table and a second table in my new sewing studio. 

I added a small table to extend the length of my sewing table.

I also have another section of table that I can use as needed.

Saturday, October 8, 2016

Camouflage blanket/poncho/ground sheet.

Making a camouflage blanket/poncho/ground sheet.

Well this isn't a quilt however it is a blanket/poncho/ground sheet for hunting.  During the previous hunting season I found it quite cold even with all my nice winter hunting gear on.  Sitting in a hunting blind when it's raining and snowing gets quite cold.  So, since I have this large roll of camouflage material I purchased to replace the cushions on our tree stands I decided to make a couple of blankets/ponchos.

I purchased 4 meters of camouflage pattern polar fleece to use as the inside lining of the blanket. 

I decided to use a simple rectangle poncho pattern.  The size will be the width of the material by the length that I choose, in this case 88 inches after assembly. 

The first step is to cut two pieces of the exterior material to the same size.  That's where my wonder clips come in handy! 

I think I need a bigger cutting table! 

Here the two pieces are mated using basting glue and my clips, then I sew a basting line down the length to hold the fabric in place.

 I folded the exterior material to create a solid edge binding.

The exterior side. 

This will be a very warm and comfy blanket.  Now to turn it into a poncho. 

After trying different types and sizes of openings I came up with this design. 

Here is the completed poncho, well almost. I still have to add some Velcro on the edges to create the opening for the arms.

The back side of the poncho.  This is big enough so you can carry a small backpack.

 This will be very comfy in rain and cold weather!

Sunday, July 31, 2016

My Sewing Studio

My Sewing Studio

When I purchased my current house, I set up a sewing area in the spare bedroom.  While this worked for a while, it quickly became crowded and difficult to use efficiently.  I had to set up a cutting table in the living room just so I could free up some space in the small room.

It's a small room but I managed to make it work.

I had just enough room to set up 3 of my sewing machines.

I created a make shift pin board with a piece of insulation Styrofoam.

I built this sewing table myself using a 1 inch melamine desk top, some legs and a drawer unit from Ikea.  I cut out the opening for the sewing machine, made a tablet to hold it and mitered out the shape of the original transparent sewing table.

I eventually decided to built a new sewing studio in my basement.  The room measures 13x16 feet and is fully finished.  It has 4 large florescent light fixtures in the suspended ceiling.  I build a large storage unit along one wall including drawer units at the bottom and shelves on top.  There is an old shelf unit in one corner, an ironing station, two long tables along the outside wall, one for the embroidery machine and the other for my primary sewing machine.  I added two extra sections of desk that I can move about as needed.  I built a floor to ceiling, 5 foot wide pin board and have a peg board for all my accessories.  I also included an old book case with doors to store office and sewing supplies.

After the walls and ceiling were built, I started building the storage unit.  That pipe is the access to the anti-flush back valve for the washroom on the other side of that wall.
 
Three bottom drawer sections and three upper shelf sections.  I had to take into account the presence of the support beam and the water pipe in the left end section.

Frame is all built.

 Painting the frame.

Installing the shelves, doors and drawers.

Fully assembled. For some reason, one cabinet is crooked. Meh!

The room is almost finished!

I installed a pocket door to save space.

A view of the rest of the room before moving in.

TADA!

A view of the pin board and accessories board.

The cutting table I built.  Still installing the ironing station.
Folding Work Table Plan

A view of the storage unit and book case.
 
 The cutting board is based on a pattern I found on another quilting blog.  I made some minor changes to the design.  It is a full 4x8 feet in size when fully opened.

 It can be folded.

Tucks away nicely to leave the floor free for use.

In the fully folded position.

With one leaf opened.

 A view of the studio from the doorway.

Close up view of the sewing desk.

Working at my sewing desk!

I have added two more table sections that I can move about as needed using a 3/4 inch melamine desk top and legs from Ikea.  I cut the length to create a small and long table.

Another view of the extra tables.